While most everyone wants to come to school in style, it’s hard to find unique yet affordable clothing and accessories. However, many FUHS students use their free time to create their own fashions, ranging from jewelry to full-on garments. Do-it-yourself (or DIY) fashion design not only acts as a creative outlet but also allows students to further express themselves at a lower cost.
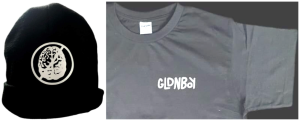
Sophomore Jacob Cuevas struggled to find a brand that would print his designs onto shirts for an affordable price, so Cuevas created his own graphic printing business called “Brainless.” Now, instead of paying over $30 for one shirt, Cuevas only spends around $5 per shirt.
Cuevas never bought new clothes to make his personal clothing. “I used blank hoodies and t-shirts that I already owned, and even asked my family for clothes they didn’t wear,” Cuevas said.
What started out as a small hobby has bloomed into a business. Cuevas has continued to produce his designs with his own printing machines. Popular on Instagram (@brainlessbenni), Cuevas’s handmade fashion now sells out almost instantly and has been purchased from clients as far away as Brazil.
Senior Sophia Galvan first hopped onto the DIY jewelry trend during quarantine, developing over time into a passion. “I started by taking random tchotchkes like Barbie shoes and melting holes into them with a safety pin I would heat up with a candle,” Galvan said. “I’d shove some hardware into them and bam, there’s a new pair of earrings that cost me literally no money.”
Eventually, Galvan realized that it is possible to DIY just about anything. “I started painting designs onto shirts with acrylic paint, making my own merch instead of paying $50 for a single shirt,” Galvan said. “I’d take thrifted shoes and paint them, or print out an album cover and layer it between tape to make stickers. If there’s something you want, you can probably find a way to make it with things you already own.”
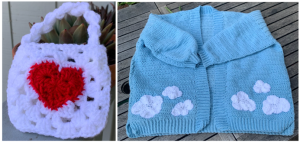
Senior Emily Ma picked up a hobby during quarantine, and although she first took up knitting, Ma soon realized that crochet allowed her to create her own patterns and shapes. She began to create plush critters, from octopi to bees. Soon, she began designing her own garments, including sweater vests and cardigans that she wears regularly.
Ma’s handmade accessories and clothing caught the eyes of her peers. Ma started her own online Instagram shop called JamJam Stationery (@jam.jam.stationery). There, you can place custom orders. She sells keychain plushes, full clothing items, tote bags, and more for reasonable prices as low as $6.
By adding small patches or drawings to clothing or turning trinkets into jewelry, students can add extra pizzazz to their looks. These hobbies can even evolve into a future business.
Try some DIY for fun
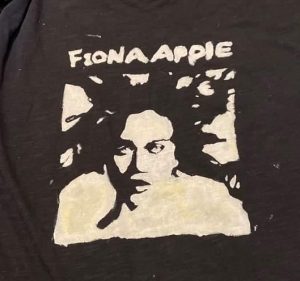
Bleach printing
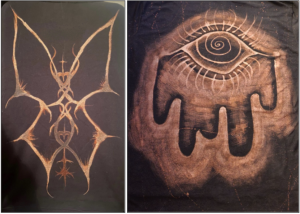
Materials: A black shirt you want to spice up, a cup of bleach, a paintbrush that you don’t mind ruining, a mask, a towel, and some kind of flat surface like a binder or folder.
Step 1. Lay out the towel in a well-ventilated area, preferably outside. On top of the towel, lay out the shirt. Place the flat surface inside of the shirt to flatten it out and avoid having the bleach bleed through the fabric. Wear a mask to avoid inhalation.
Step 2. Dip the brush in bleach and paint a design of your choice onto the shirt. The bleach takes a few minutes to settle, so we recommend working in thin layers. The longer you let it dry, the lighter it will be. Wait in between layers. You can cut a shape out of a piece of paper to use as a stencil or freehand it if you’re feeling brave.
Step 3. The bleached areas often come out a light orange color. Once your design is dry, we recommend going over it with another round of bleach to make the design a brighter white.
Step 4. Let dry for at least an hour. Afterwards, wash the shirt and you are done!
Shrinky Dink jewelry
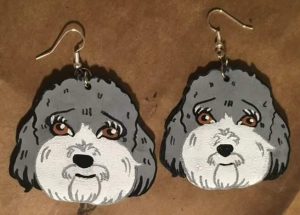
Materials: Shrinky Dink paper, paint markers (or any coloring material), scissors, hole-puncher, keychain or other metal hardware, parchment paper, toaster or oven. The hardware can be repurposed from old jewelry you don’t wear.
Step 1. Paint, color, or even print your design onto the Shrinky Dink paper. Packs with multiple sheets of paper are available for under $15 online, and there are multiple finishes available.
Step 2. Cut out your design, leaving room for a hole punch. Punch the hole where you want the hardware to attach to the design.
Step 3. Place the Shrinky Dink onto parchment paper in your heating tool. Keep a close watch, as you’ll want to remove your piece as soon as it is done shrinking (with heat-safe tools). Lay the design on a cold, flat surface to cool. We recommend using a flat surface to press down on your piece to ensure that it is flattened.
Step 4. Attach the hardware by looping some kind of metal piece through the hole punch. Because the design has shrunk to about ⅓ of its original size, the hole is perfect for a jump ring. Now you have some cool new accessories!
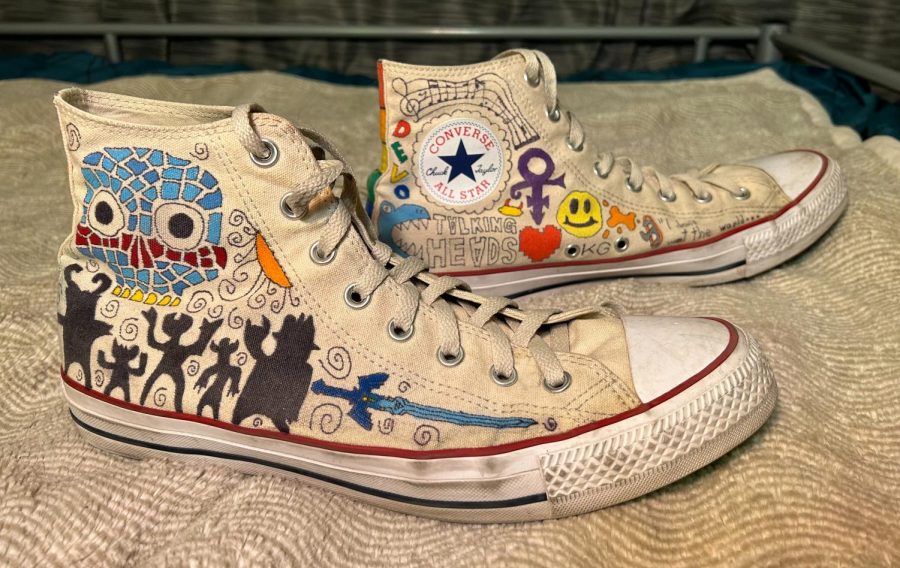
Custom shoes
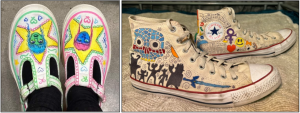
Materials: Plain canvas shoes, light colored pencil, and acrylic paint or paint markers. The shoes can be used or thrifted; whatever you have easiest access to.
Step 1. Look online for inspiration. Check out some doodles, tattoo designs, merchandise for favorite shows or musicians to incorporate into your design.
Step 2. Sketch out your designs onto the shoes using a light colored pencil or paint marker. This allows you to cover up your sketch easily when painting.
Step 3. Color in your designs! There are no rules. And now you have a fresh, unique pair of shoes.
Personalized jacket
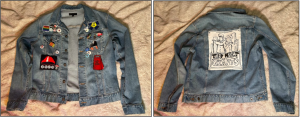
Materials: Old jacket, scissors, scrap fabric, acrylic paint, and any other pins, buttons, patches or charms you want to add. We recommend hand sewing patches onto the final product, but hot glue would work as well if that is more accessible.
Step 1. Cut your scrap fabric into simple shapes. Paint any design of your choice onto the fabric. Make as many of these DIY patches as you’d like.
Step 2. Lay out all of your decorations on top of the garment (flat and laid out). Rearrange to your heart’s content.
Step 3. Hand-sew or hot glue those patches on, stick on those pins, and attach those charms. Jackets like these are often collages of the owner’s interests; don’t be afraid to stand out.